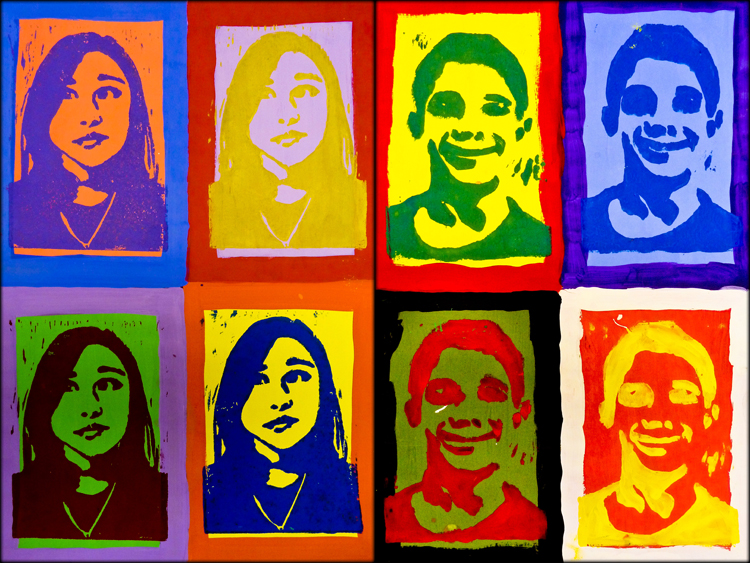
KMS Art students wrapped up the end of 3rd quarter with a Pop Art Printing project that featured a self-portrait of each individual. The lesson was inspired by the graphic and colorful prints created by Pop Artists in the 1950s. Students were briefly introduced to the artwork of Roy Lichtenstein, Claes Oldenburg, Robert Rauschenberg, Jasper Johns and Richard Hamilton. Our main influence, however, was derived from Andy Warhol’s iconic images that define the Pop Art movement.

“Everyone will be famous for 15 minutes.” -Andy Warhol
Hello, I am an art teacher and do a similar project. I am looking for different ways of doing the Warhol project, can you give me your lesson plan for this or instructions on how you get the extreme positive and negative of their photo?
Hi Lindsey, To be perfectly honest, I no longer write out all of my lesson plans. There are many ways to go about creating the extreme contrast, but here is how I approached it using Adobe Photoshop CS5:
1. First, set up your digital camera in a well-lit location and take all of the digital photos under the same conditions. Consistency in your photographs will make the next steps more efficient.
2. Desaturate to change the image to black & white.
3. Under “Image,” select “Adjustments” and scroll down to “Posterize…”
4. Play with the levels using the Posterize option… 2 or 3 worked best for me
*Tip: Since I had so many images to work with (about 160), I created an Action in Photoshop that made the process much quicker. If I do this project again, I think I will try to edit using Adobe Bridge because it is more efficient for batch editing. (Even better, I’ll teach the kids to do this part!)
Hello I live in Spain and would love to teach this to my daughter, can you please tell me how you did the rest?
Thanks in advance
Marisa
I would like to know the rest of process …please can you tell us?
thanx