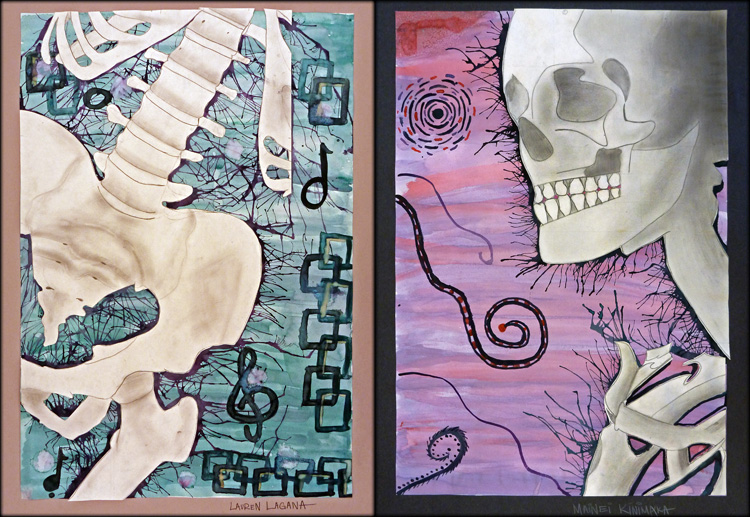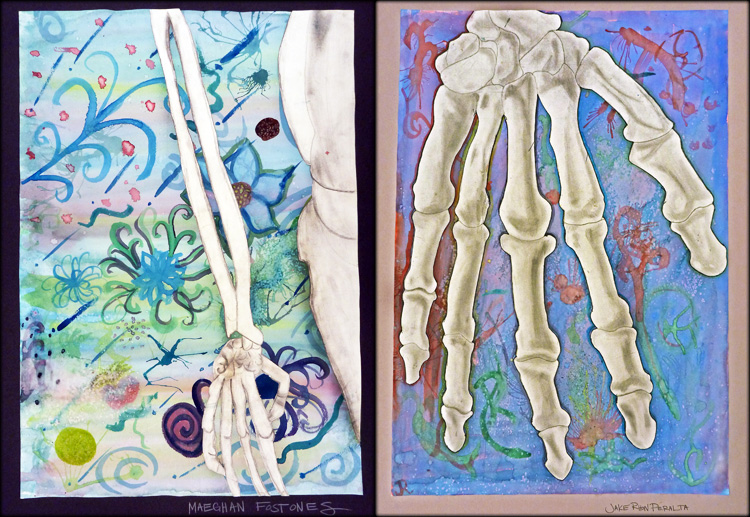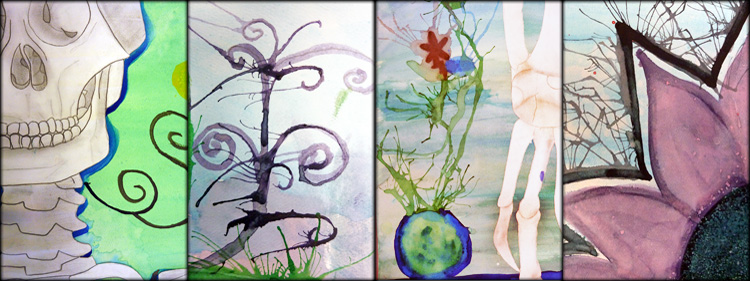
Kapaa Middle School Art students recently finished a two-part project featuring skeleton drawings that were cut out and mounted on a watercolor background. As an introduction, we studied the Hispanic holiday of Los Dias De Los Muertos and looked at skeleton artwork by the famous Jose Guatelupe Posada.

Students began with a small printed image of a skeleton and instructions to not only draw the image, but to enlarge it by 4 times! This was accomplished by measuring a grid that enabled them to draw the complex figure in small sections while maintaining the correct proportions.

While the process of measuring, drawing, shading and cutting of the bones was painstaking and meticulous, the background allowed students to be more expressive and free-form. Students were introduced to 6 different watercolor painting techniques which they practiced in their sketchbooks. The only requirement for the final background was to incorporate all 6 techniques.

“An artist will sooner and with more certainty, establish the character of skeletons, than the most learned anatomist, whose eye has not been accustomed to seize on every peculiarity.”
– Rembrandt Peale (American Artist & Naturalist)

I love the Dia de Los Muertes project. Is there a way you could share more about exactly what the students were expected to do? What type of picture were they drawing from? Anything?
Thanks,
Jan
Hi Jan,
The first part of this project was focused on proportional drawing (using a grid to enlarge and reproduce), along with value & shading. Students were allowed to choose from a number of different images that I had already sized and printed so that they could all use the same ratio for enlargement. After measuring, drawing, and labeling their grid, students were instructed to first draw a light contour of the skeleton before shading.
The second part of the assignment aimed at creating an interesting background with watercolors. Students practiced several techniques in their sketchbooks before creating their final. The last step was to remove the negative space around the skeleton bones (we used scissors, but X-acto would have been better), and the final drawings were glued to the background.
Hi Julia!
My name is Sharon and I am a middle school art teacher in Los Angeles, CA. I found an image of one of your art projects on Google, and loved it! I’m always looking for new and different art projects, and love all your art projects! They are so great!
I especially like the skeleton project, was hoping that you could give me a little more info on how you did it. You mentioned the 6 techniques of watercolor for the background…can you tell me what the 6 techniques are? And did students only get a piece of the skeleton to enlarge? That would be so helpful!
Thank you so much!
Sharon
Hi Sharon,
Thanks for checking out my site!
The watercolor techniques included: wash, wet-in-wet, glazing, gradient, masking, and blowing with straws. Each student chose from skeleton images that I had already sized and printed (yes, they were only parts of the skeleton). Hope that helps!
Thank you so much! The project is amazing! Keep up the excellent work, and thanks for sharing!
This is a brilliant project. We are doing ‘structures’ and we have been doing charcoal and white chalk pastels of skeletons. I wanted to do a different technique that made it more fun – so the Day of the Dead Human Bones are great!!! thanks so much. What is glazing? Thanks
Thanks Alice,
Glazing is a watercolor painting technique where thin transparent washes of color are layered allowing underlying colors to show through. The key to glazing is allowing each layer to dry completely before painting a new color on top. Sometimes the result is unexpected and the kids have fun experimenting. Good luck with your project!
Just beautiful! I must admit that I like the backgrounds the best –iI am still working on appreciating the beauty
Of the human skeleton:). This wonderful artwork sure helps!!
Thanks Momma Ruth… Not too creepy, right? This was a good balance of technical drawing for the skeleton bones with more freedom and spontaneity for the painted background. Glad you like it!
This is one of the best 6th grade projects I have seen yet! Wondering what size you ended up using for the background. Trying to keep this under 5 weeks to accomplish. Also, would you be willing to share the photos you sized for the skeleton? Do you have a teachers pay teachers account? Thanks!
Hi Chelsea,
I’m sorry, but it has been a few years since I did this project and I don’t have the pictures that I sized anymore. The watercolor backgrounds that we did were fairly large- probably around 18X24. The majority of time was spent on the bone drawings (watercolor background is pretty quick), and I would definitely size it down to save time. Good luck with your project!
Would you be willing to share this lesson? I am very interested in your requirements and rubric. The results are beautiful.
Thank you, Kelly!
Unfortunately I don’t have the original rubric and resources that I created for this project back in 2011. I’m a little better at saving and organizing my documents now because my husband trains me… he’s very meticulous 😉
I use a 4 point rubric for all of my assignments (4 is highest, 1 is lowest). Looking back on this project, I probably evaluated the following:
1. Proportion: The degree of accuracy in which students enlarged the image (bones) using a grid
2. Value The degree to which students modeled the form using a smooth gradual transition from darker shadows, to mid-tones and highlights
3. Watercolor Techniques– The degree to which students incorporated all 6 techniques that they learned in class.
Hope that helps!
Hello,
I am an art education student, I love this project. But, are the skeletons cut out of another sheet of paper? or did you use some type of mask? if so what did you use?
Hi there! Love this project. You had the kids drawing from photos of skeletons? How did they chose what section to enlarge and add to their composition? Was the original skeleton photo broken into a grid and they could pick a square?