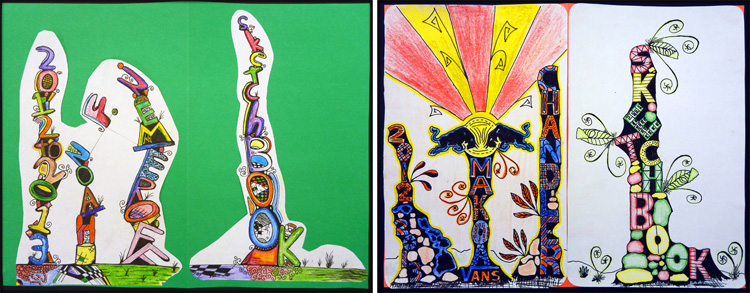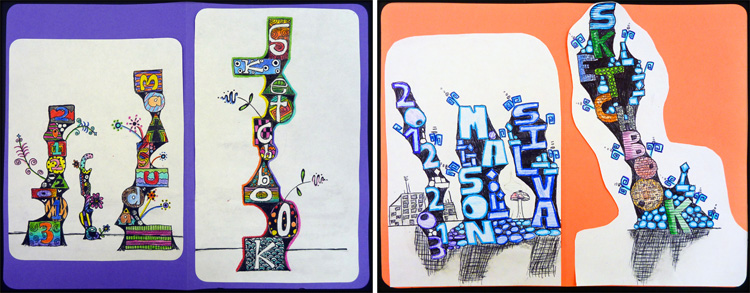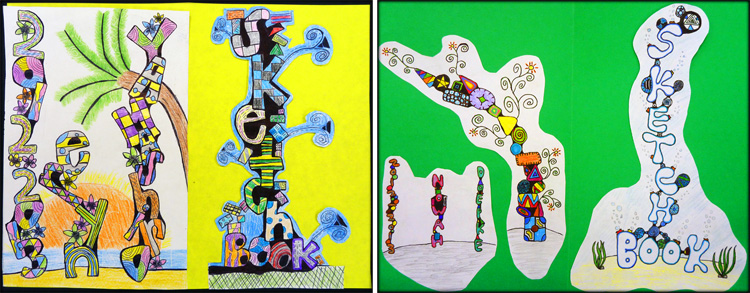
The 2012-2013 school year is off to a great start in the Kapaa Middle School Art classroom! It is becoming my yearly tradition to begin with the construction of a sketchbook that each student makes and then uses throughout the rest of the year. I try to come up with a different theme or design for the sketchbook cover each time because it keeps things interesting for me and also for my repeating students. Here is a sample of some of this year’s student cover designs…

The final covers are laminated and folded vertically down the center so that “Sketchbook” appears on the front, and student names are on the back.

This year’s theme involved vertical “stacks” of letters and shapes. The lesson explored letter design along with the element of texture, and principles of pattern and balance.

Although students were given the same steps and basic instructions, they still came up with a wide variety of interpretation and unique perspective.

Great job to all of my Art students! I hope that you become good friends with your hand-made sketchbook over the year, and that you spend many creative hours together!

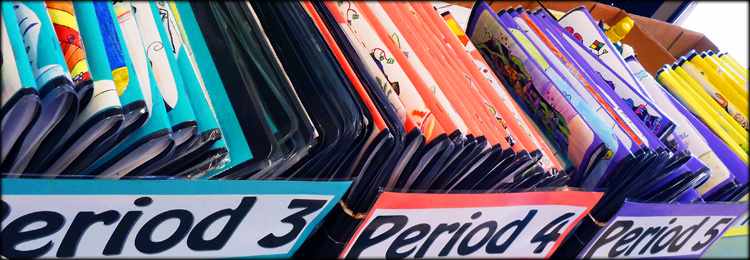
Now for a weekend of grading! Here they are all color-coded, lined up, and ready for evaluation…

I love this idea! I will be doing this with my students next year. Did you just use construction paper? it looks like you used three different papers….the white paper for drawing, the colored paper behind that and then a black paper? And then you just stapled some paper inside after laminating them? Sooo cool! I really enjoy your website, I’m getting very inspired, thanks for sharing!
Yes, Jennifer, you are exactly right! The drawing was done on regular white printer paper, the colored paper is also thin printer paper, and the black is construction. I used a different color for each class period, which comes in really handy when kids accidentally leave them out, or for grading. The cover and inside pages are folded together and I used a long-armed stapler to reach the middle. Another tip… our old laminator does a much better job with thinner papers (once I tried with thicker nicer drawing paper and it just got munched).
Thanks for the feedback!
Hi,
Can you tell what kind and where you ordered the colored paper? I can’t find any long thin colored paper. I am looking on the blick art website. The closest i can find is the bright colored vellum paper 11 by 17 inches. Is that what you used?
Looking forward to trying this project with my students this year 🙂
Thanks
I ordered the colorful paper from Office Max… The brand is Fireworx (colored multi-use paper 8.5 x 11″). It can be ordered in a multicolored pack, or individual colors. Really any type of colorful printer paper will do. Hope that helps!
How long did it take you to laminate, and grade all sketchbooks before returning them? Did anyone help you out? Seems like a long workout.
Hi Mollie,
A “long workout” is a good way to describe it. I didn’t have any help laminating (boy I sure miss having TAs!), but it’s a one-time chore at the beginning of the year and definitely a necessary step to make them last. I can’t remember exactly how much time I spent, but it most definitely involved some evening or weekend time to do that along with grading. And GRADING is another thing! I definitely could use some tips or suggestions to make this process more efficient… Its my least favorite part of teaching. I always use a 4 point rubric, involve some sort of student evaluation or critique, and do my best to provide written or verbal feedback. This definitely adds up with so many students and projects. Any ideas out there are welcome!
These are super – I have tried many versions with students over the years and these look like fun. May I ask the dimensions? The drawing paper looks folded and stapled inside? You do wonderful things with your kids!!
Thanks Suzanne! The dimensions of the paper are 8.5 x 11″ (regular printer paper). Yes, the whole thing is folded over and stapled with a long-arm stapler. I add a slightly larger sheet of black construction paper to the cover for added thickness and a little “overhang.” Every year I change the cover theme and add various pre-printed worksheet pages to the inside, but overall I continue with the same basic sketchbook construction because it works great!
I was so excited to try this project with my students, but i just found out i wont be able to use the laminating machine at work 🙁 and laminating rolls or sheets are soooo expensive 🙁 Did you use a laminater or self laminating sheets?
Oh no, that’s a bummer that you can’t use the school’s machine. I haven’t tried using the laminating sheets that you peel by hand because its expensive, like you said, and would take too long. Good luck working it out, and share what you end up with!
Any links or topics as to what kind of pre printed sheets you use? Thanks!
Hi Kari,
I make all of my own printed pages for the sketchbooks. It has evolved over time, and I always revise and make changes depending on what I plan to teach each year. Usually I include short activities to help students understand the Elements and Principles of Design. I also provide a Sketchbook Contract, a Name Page, and a list of Sketchbook drawing activities for when students have free time. Thank you for your request, and I will work on posting more resources when I have a little extra time 🙂
Julia
Hi Julia,
Thanks for all the info. here! I am looking to laminate my kid’s sketchbooks as well. Am I correct that the books are actually 8.5 x 5.5 when folded? Since the colored paper is 8.5×11 and contains the front and back…
Thanks so much!
Hi Genevieve,
Yes, your estimation is pretty close. I actually put a 9×12″ piece of construction paper behind to frame the cover design and extend it a little further than the pages on the inside. So the pages (when folded) are 8.5×5.5, and the cover is 9×6. Hope that clarifies it for you! Good luck with your project… Sketchbooks are so great!
Awesome! Thanks so much for taking the time to answer 🙂 I think I may try that size next year!
Julia, Regarding Grading;
I have taught prep-grade 12 all at once at an international school and Grading is a big giant time vortex.
Also, I’ve taught up to 800 kids in elem at once in 4 days….
So, I use shortcuts;
I have codes I use on my roll call chart, name chart or seating chart to track general progress and effort-
Rubrics- I have older kids do them more often but sometimes they do not do one for every project.. And I use self reflective rubrics which I go back and make comments on and feedback. I would enter some of those grades from MS and upper elem when my high level HS art kids were working. But I did end up spending 60-75 hours a week at work some weeks and it did start to take a toll over time. We didn’t have subs or helpers. Some of the large elem schools had loads of parent helpers as well as full time copy room folks who could do stuff like laminating for you in NC, but not overseas.
Codes- * or **. Excelling or A+
-e is lack of effort
-c is lack of creative effort
ot is off task
-b is behavior issue
OK is middle of the road
imp – (improving) means doing better than previous notations
At the end of the day, I do my best to have balance. Sometimes, if there is loads of prep I need to do, I don’t do as much detailed rubric grading and just look through the pile and do my marking quickly. If a kid is low, I might put a sticky note on it and give them specific feedback and questioning to try to get them to improve the work. I put up different examples from this pile to show exemplars for Excelling/ Mastering/… and use Old student work that was abandoned for lower examples and point out specific room for improvement to the class. I have my goals or making objectives posted and sometimes write questioning on the board for them to go through as a list before claiming they are finished.